Printing Maps
In today’s post, we’ll explore a popular topic - printing. This is a common business requirement and a frequent question at our helpdesk and forums.
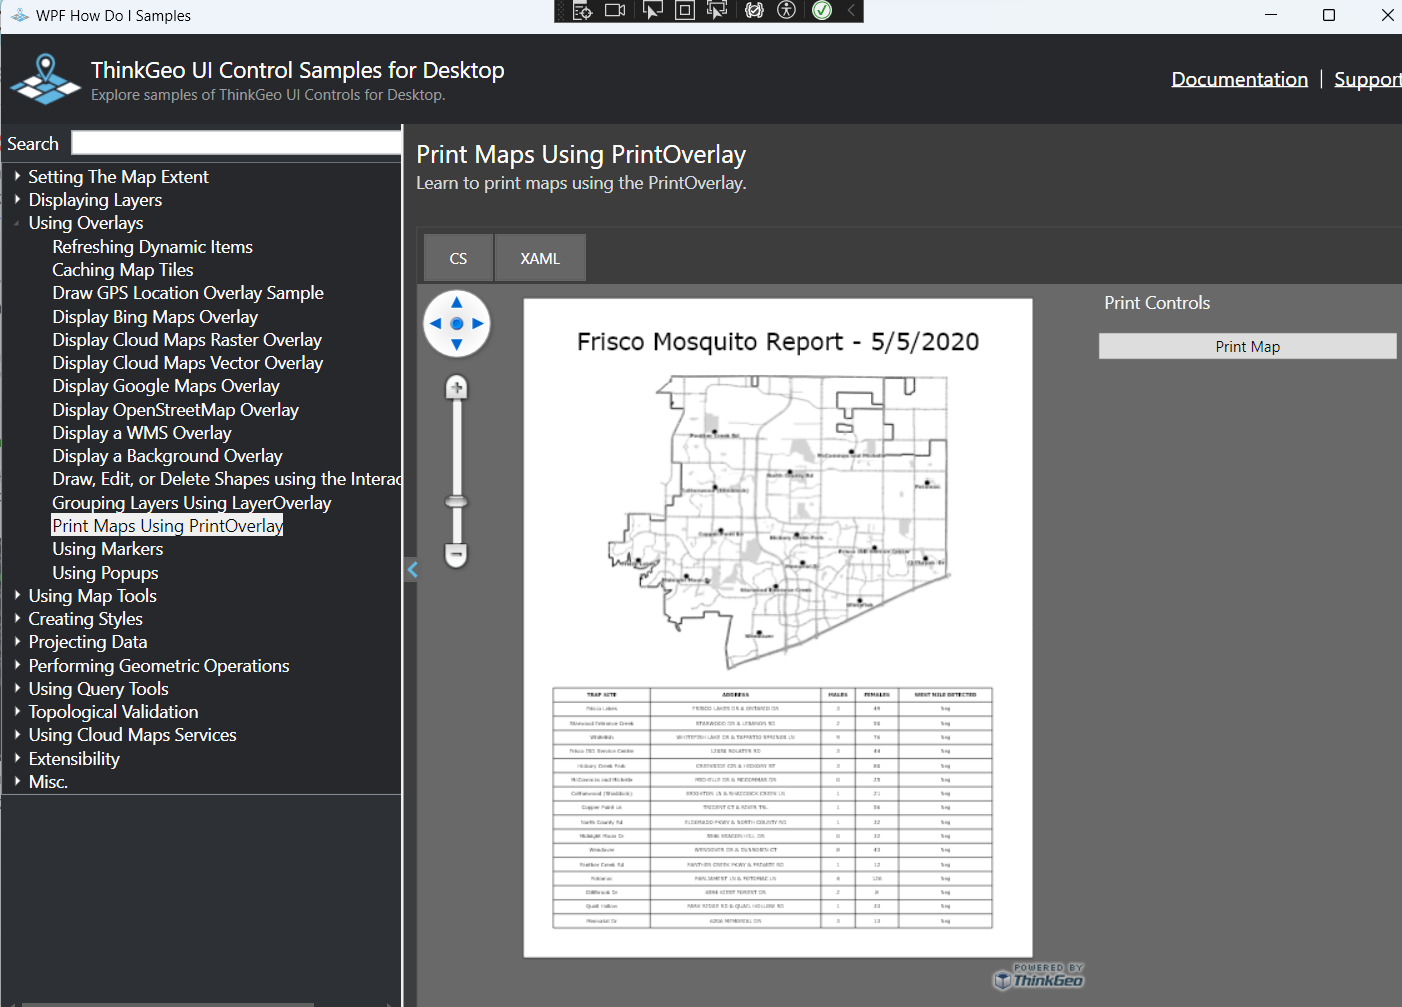
To see the printing sample in action, just clone the latest WPF ‘HowDoI’ samples and open up the ‘Print Maps Using PrintOverlay’ sample. While the sample above is using ThinkGeo Desktop WPF, the printing classes are all part of ThinkGeo.Core and are also available on ThinkGeo Mobile and Web.
Sample Overview
The ‘Print Maps Using Print Overlay’ sample demonstrates how a developer can generate an A4 (8.5 x 11) document with a Title, Map and Data Grid. The document is shown in a print preview and can then be sent to pdf or printed using the button on the right side of the document. While the sample focuses on a simple 8.5 x 11 printout, it’s easy to adapt the sample to any other page size that your users may need.
Code Examples
When viewing the code in the ‘Print Maps Using Print Overlay’ sample, you’ll notice some special classes like PrinterInteractiveOverlay and PagePrinterLayer. To use these printing-specific features, you’ll need to reference the ThinkGeo.Printers nuget package.
You’ll also notice in the sample that there are 5 main functions that are used to build up the print preview and generate the pdf for printing. A summary of each function and the relevant sample code is below:
SetupMapForPrinting() - In this function, you will find many familiar ThinkGeo map functions such as setting your GeographyUnit, but then you will notice some subtle changes with the usage of a PrinterZoomLevelSet and PrinterInteractiveOverlay. These classes inherit from the same ZoomLevelSet and InteractiveOverlay that your other map overlays and zoom levels inherit from, but they have extra functionality just for printing. But the coding style and usage is very familiar to what you use on your other maps. The sample below shows how to use these classes to set up your map for printing:
            // Set the map's ZoomLevelSet to a set of common printer zoom settings
            mapView.ZoomLevelSet =
                new PrinterZoomLevelSet(GeographyUnit.Meter, PrinterHelper.GetPointsPerGeographyUnit(GeographyUnit.Meter));
            mapView.MinimumScale = mapView.ZoomLevelSet.ZoomLevel20.Scale;

            PrinterInteractiveOverlay printerOverlay = new PrinterInteractiveOverlay();
            PagePrinterLayer pageLayer = new PagePrinterLayer(PrinterPageSize.AnsiA, PrinterOrientation.Portrait);

            // Style the pageLayer to appear to look like a piece of paper
            pageLayer.BackgroundMask = AreaStyle.CreateSimpleAreaStyle(GeoColors.White, GeoColors.Black);

            // Add the pageLayer to the printerOverlay
            printerOverlay.PrinterLayers.Add("pageLayer", pageLayer);

            // Add the printerOverlay to the map
            mapView.InteractiveOverlays.Add("printerOverlay", printerOverlay);
AddPageTitleLabel() - This simple function just adds a title to the printout using the LabelPrinterLayer class and then positions the label appropriately. The code is below:
            // Create a title using the LabelPrinterLayer class.
            var titleLabel = new LabelPrinterLayer("Frisco Mosquito Report - 5/5/2020", new GeoFont("Verdana", 8), GeoBrushes.Black)
            {
                PrinterWrapMode = PrinterWrapMode.AutoSizeText
            };
            // Position the title label
            titleLabel.SetPosition(7.5, .5, 0, 4.75, PrintingUnit.Inch);

            // Add the title label to the PrinterInteractiveOverlay
            printerOverlay.PrinterLayers.Add(titleLabel);
AddMapLayers() - This function adds several ShapefileFeatureLayer layers to the map just as you would in any other map. In this sample, it’s the mosquito data as well as roads and parks for the basemap. The key takeaway from this function is the last few lines where the shapefile layers are added to a MapPrinterLayer which is then positioned on the PrinterInteractiveOverlay:
            // Create the mapPrinterLayer, adding the FeatureLayers that we want to print
            var mapPrinterLayer = new MapPrinterLayer(new Layer[] { cityLimits, streets, parks, mosquitoSightings }, mapExtent, GeographyUnit.Meter);

            // Set the position of the map using the pageLayer's centerPoint
            var pageCenter = pageLayer.GetPosition().GetCenterPoint();
            mapPrinterLayer.SetPosition(7.5, 5, pageCenter.X, pageCenter.Y + 1.75, PrintingUnit.Inch);

            // add the mapPrinterLayer to the PrinterInteractiveOverlay.
            printerOverlay.PrinterLayers.Add(mapPrinterLayer);
AddMosquitoDataGrid() - Next, our example demonstrates how to add a datagrid to the bottom of your printout using a DataGridPrinterLayer which is then also added to the PrinterInteractiveOverlay just the same as the code above.
PrintMap_OnClick() - Finally, our example has an event handler for the print button that will build up a pdf that can be sent to the printer. This function uses the PrintDocument and PrinterGeoCanvas to render and print the contents of the PrinterInteractiveOverlay and MapPrinterLayer that were built up in the previous functions. The important bits of code are highlighted below:
            // Create a printDocument that matches the size of our pageLayer
            var printDocument = new PrintDocument
            {
                DefaultPageSettings =
                {
                    Landscape = pageLayer.Orientation == PrinterOrientation.Landscape,
                    PaperSize = new PaperSize("AnsiA", 850, 1100)
                }
            };

            // Create a printerGeoCanvas that will allow us to print Layers onto the printDocument
            var printerGeoCanvas = new PrinterGeoCanvas
            {
                DrawingArea = new Rectangle(0, 0, (int)printDocument.DefaultPageSettings.PrintableArea.Width, (int)printDocument.DefaultPageSettings.PrintableArea.Height)
            };

            // Start drawing on the printDocument
            printerGeoCanvas.BeginDrawing(printDocument, pageLayer.GetBoundingBox(), mapView.MapUnit);

            // Draw each layer in the PrinterLayers collection except for the background PagePrinterLayer
            foreach (var printerLayer in printerOverlay.PrinterLayers.Reverse())
            {
                printerLayer.IsDrawing = true;
                if (!(printerLayer is PagePrinterLayer))
                {
                    // Draw the layer
                    printerLayer.Draw(printerGeoCanvas, new Collection());
                }

                printerLayer.IsDrawing = false;
            }

            // Finish drawing and send the print commands to the printer
            printerGeoCanvas.EndDrawing();
Summary
We hope today’s post has been informative. If you have any questions or if you have a topic you would like to learn more about, please email sales@thinkgeo.com or schedule a meeting to talk in person.
About ThinkGeo
We are a GIS software company founded in 2004 and located in Frisco, TX. Our clients are in more than 40 industries including agriculture, energy, transportation, government, engineering, IT, and defense.
We pride ourselves on our excellent service and transparency. ThinkGeo offers a variety of products and services to meet almost any GIS application need. We can even help you develop your next project - anywhere from a few hours of consulting to outsourcing an entire project. To learn more, email us at sales@thinkgeo.com, or call us direct at 1-214-449-0330.